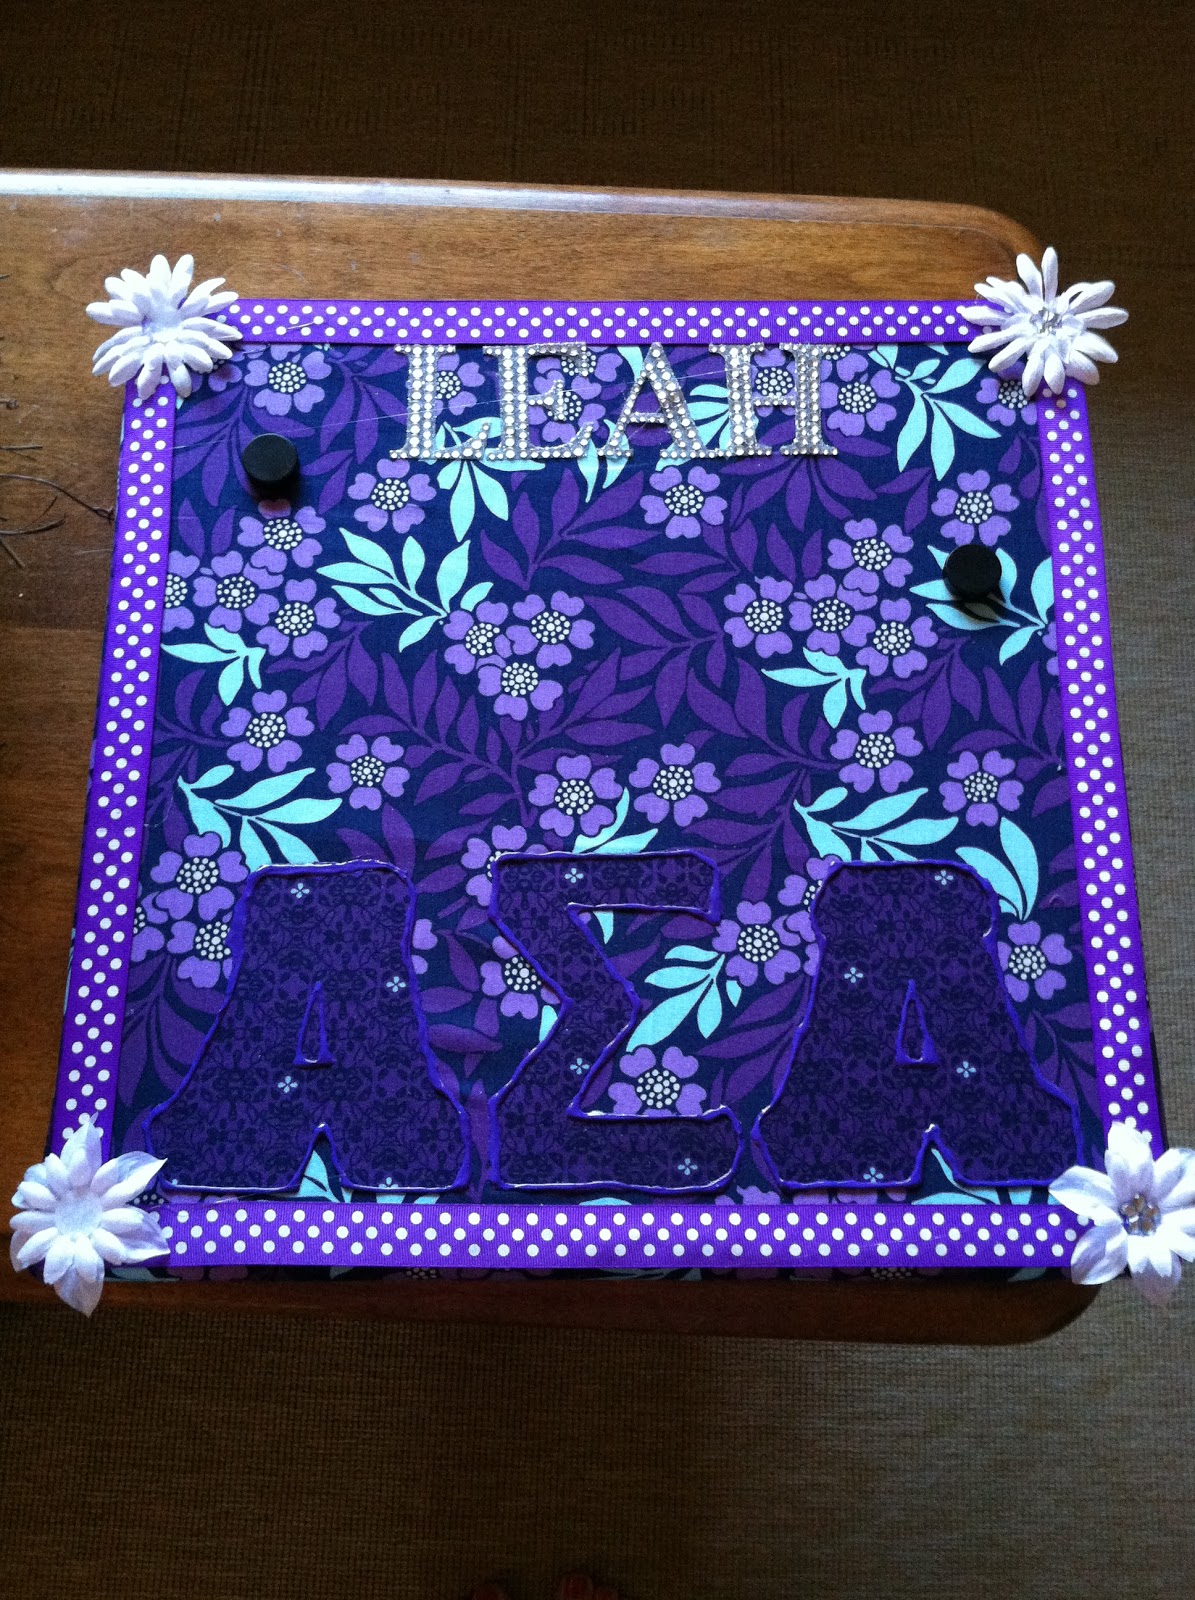
So I know for many sororities, it's getting close to big-little week, so I thought I'd share a craft with you that I made my Pearl last week.
This was such a simple, inexpensive project, and I absolutely love the way it came out. I bought the picture frame from Walmart (I think it was $5 or less). It already had all the frames connected.
I just painted each frame a different color, using the middle frame with one of those circle sponges to make polka dots (I was tempted to try chevron too, which would be super cute). Then once all the paint dried, I use puffy paint to write and tied a small bow out of ribbon and attached it to the top frame.
If you are giving it as a gift, I'd recommend either putting photos in it, or using scrapbook paper that matches the frames (like I did) to give it a complete, finished look.
Happy crafting!
Showing posts with label crafts. Show all posts
Sunday, October 6, 2013
Sunday, July 7, 2013
How Incorporate Chevron Into Your Dorm!
Hi guys!
I don’t know about you, but I’m a little obsessed with
chevron. I find myself wanting to incorporate the print into pretty much every
facet of my life. Chevron pedicure? Dying for one! Chevron tank? I’m obsessed
with mine from Lizard Thicket. Chevron phone cases, makeup bags, wallets,
purses, totes, and agendas? They all call my name like you wouldn’t believe.
And of course when it comes to incorporating it into my apartment for my senior
year, I find it really hard to resist.
Now I’m by no means the authority on prints, and in the
end I’d say do what makes you happy, but I think there are definitely tasteful
and great ways to use chevron, and then there are ways that aren’t so great.
Chevron is a busy pattern. I love how graphic and clean,
but interesting it is, but if you’ve looked at chevron fabric, I hope it didn’t
give you a headache like it did me. The pattern needs to be broken up into pieces,
or to have scattered throughout. Don’t make it look like chevron threw up all
over your room.
So some chevron looks that I think are appropriate and
pretty for college dorms and apartments just have small doses of chevron. Think
throw pillows, a couple picture frames, a bulletin board, a blanket, a duvet
cover, or a rug. But please, don’t do all of those things!
Chevron looks great for just a little pop of interest.
Make sure to mix patterns! Mix it with dots, solids, ikats, or florals! But
please never put chevron right next to something zebra. It never works.
-Make DIY chevron wall art. You can either paint (use stencils from online for the cleanest lines) or fabric. My little made the one with the A and I made the one with the C below.
-Throw pillows are some of my favorite looks with chevron. This is my bedroom at home with a navy chevron throw pillow.
-Bulletin boards are great too! They can be homemade or storebought (you know when I talked about chevron making you dizzy? Well my bulletin board made me dizzy looking at it, try using larger chevron patterns)
-Chevron bedding is adorable too! Just make sure to break it up with solid or small printed sheets, small printed throw pillows (think dots or small simple florals).
![]() |
| American Made Bedding |
Isn't that bedding just lovely?
I hope this helps a little bit with the chevron craze. I know I want it incorporate it some way into my apartment, so we'll see what happens. Let me know what your plans for your dorm rooms are.
Are you obsessed with chevron and dorm design? Take a look at this post on some favorite chevron products, my senior year mood boards, and my apartment to-do list!
Labels:
advice,
chevron,
college,
college life,
crafts,
decorating,
dorms,
my dorms
Sunday, December 16, 2012
How to Paint Leopard Print
Leopard
print is all the rage right now. It’s on home décor, clothes, and even mascara
tubes. So for my sorority’s big
appreciation day, I wanted to give my big her initial with a leopard print on
it. And instead of covering it in paper, I decided to paint little leopard
spots all over it. Painting is not my strong suit, but this step-step helped so
much!
Step
1
I
took the circle sponge brushes I had (three different sizes) and put dots all
over the S.
Step
2
After
they dried, I took a small paintbrush, and a dark purple color, and outlined
the spots in three different patterns:
1.) I made a "C" shape around the dots
2.) I made a shape with two "C" shapes
3.) I outlined the entire spot shape
Remeber, to not be so precise! They are abstract, so play with different thickness, different shapes, and just play with it!
1.) I made a "C" shape around the dots
2.) I made a shape with two "C" shapes
3.) I outlined the entire spot shape
Remeber, to not be so precise! They are abstract, so play with different thickness, different shapes, and just play with it!
And
there you go! It’s really that simple and really fool-proof.
Saturday, December 15, 2012
My Newest Paddles
So pillow paddle came
and went a few weeks ago with my sorority, and I’m so in love with my paddles.
Once you see them, you’ll know why. They are me.
Like I've said in previous posts, it's always important to make a paddle that means a lot to your big (or anyone) with personal touches. Like the red and black one that matches my room and the Vera one that matches my obsession.
What would be your perfect paddle? Would it be a Vera Bradley? Lilly Pulitzer? Sports related? Pearls and glitter?
Wednesday, October 31, 2012
Cute Ways to Spoil Your Little
Wondering where I went
last week? Well, it was big/little week here at my sorority, so I was busy
crafting like one of Santa’s elves. I lucked out and got twins (two girls that
I LOVE), so that meant I was busy crafting for over a week straight. I love crafting
though, so even though it was slightly stressful (and my perfectionism was
definitely kicking in), it was a lot of fun and so worth it to spoil my littles
some.
Making and picking out
cute gifts for littles can be super difficult and so expensive. Every sorority
at every college has different traditions and expectations of amounts and money
that should be spent, but I thought I would offer some cute ideas that I love
(and some I even used!).
Matching T-Shirts!
Here at my sorority, we
devote a day to giving our littles cute shirts, ones that generally match their
future big’s, and sometimes even their future grandbigs!. I made my twins
matching ones, that were just in different colors and with their names on the
back! I’m currently loving bows, so I made sure to design a bow on the front
and back! Hurting on cash a bit? Make them shirts! Whip out the puff paint,
fabric, or use one of the t=shirt design programs for your computer! The
thought is what counts!
Flowers!
I decorated cheap $3
vases from Walmart with nifty Marta Stewart class paint (using sponge polka dot
brushes of course!). I personalized them with their names and our sorority. I
then gave them each a dozen roses. If that’s a tad too expensive, use other
cute flowers like daisies or carnations, in your sorority’s colors!
Bulletin Boards
This was my favorite
thing to make my twins! See, my own big made me a board that I absolutely love.
It was my favorite gift I received from her, and I wanted to follow the same
design. I just customized them to my littles’ preferences. It was so much fun
and really inexpensive too!
Favorite
Snacks/Candy/Food
This is such a simple,
cute idea to spoil your little! If you sorority doesn’t give out information
sheets on your new little, have a sister sneakily ask her what her favorite
foods, candy, and restaurants are. In my gift bag and boxes I included all of
their favorite candy. And another day I added little $5 Starbucks gift cards
(in clean Starbucks cups I decorated with ladybugs and ribbon!).
Rainboots or Shoes
Many girls in my
sorority decorated rainboots with polka dots and monograms for their littles. Whether
it was Toms look-alikes or just tennis-shoes, these came out so adorable! Bonus
points for matching ones!
Pinbox
Making a cute little
box for your little to store her pin in is a sweet gift for either big/little
week or initiation. My Ruby when I first joined my sorority made me a pin box,
that was also large enough to hold my bid card and some other important items
from my membership.
Slippers/Stuffed Animals
Having a soft, stuffed
animal or some fuzzy slippers in your sorority mascot are always fun things to receive.
Pillow Pets are always popular as gifts too.
Blanket
Some sororities have
traditions of making their littles fleece tie blankets, and they are very cute
things to get and hold onto. Plus, they are very easy to make! There are wide
varieties of fleece out there, and places always have sales on their fleece.
I hope this list of
ideas make shopping and crafting for your littles easier and more fun! Enjoy each
and every second of big/little week, and remember that the relationship with
your sister is the most important part!
Thursday, September 20, 2012
The Making of a Paddle
As I've talked about a lot, I'm in a sorority. And in sororities, it's extremely common and super exciting to make paddles for each other.
Now I know what you're thinking...that paddles are used for not so nice things. But that couldn't be further from the truth. Paddles in sororities are kind of like one of the biggest, most special, heartfelt presents a sister can give. They are usually given for the Big/Little Pillow/Paddle exchange (Littles make their bigs a paddle and bigs make their littles a pillow!).
But as a cute in-house bonding thing, my sorority decided to do it just for the girls that live in the house. And of course, I was excited. See, I love love love crafting. And there are so many different paddle ideas that I want to try! And not nearly enough occasions for it either.
For reference, last November, this is the paddle I made my big! She loves snowboarding and skiing, so I decided to do a snow theme!
Now I know what you're thinking...that paddles are used for not so nice things. But that couldn't be further from the truth. Paddles in sororities are kind of like one of the biggest, most special, heartfelt presents a sister can give. They are usually given for the Big/Little Pillow/Paddle exchange (Littles make their bigs a paddle and bigs make their littles a pillow!).
But as a cute in-house bonding thing, my sorority decided to do it just for the girls that live in the house. And of course, I was excited. See, I love love love crafting. And there are so many different paddle ideas that I want to try! And not nearly enough occasions for it either.
For reference, last November, this is the paddle I made my big! She loves snowboarding and skiing, so I decided to do a snow theme!
So when I learned that I had the opportunity to do another, I jumped on the chance.
My secret sister that I was given only gave me one thing to work with, and that was her favorite color: red. Which is pretty easy since it's my favorite as well!
I knew that I wanted to use pearls and lace. And my masterpiece was created!!
This paddle was so much fun to make and was really easy actually. And it was a hit with my secret sister and the rest of the sorority (both paddles that I've made have been on display for recruitment, which makes me beyond happy).
So in case you are wondering, some paddle making tips I have:
-Have a plan in mind! It sounds simple, but it's easy to get overwhelmed at Michael's or Hobby Lobby. So draw pictures, spend hours on Pinterest, and think about what you want to do.
-Making "pretty" paddles are fun, but the ones that impress people the most, are the personal ones. So if you're big loves giraffes, slap some cute giraffes on it! If she loves cupcakes, do that! Don't just do a simple paddle that's not personal. If you're big loves Snoopy, she'll be more impressed with Snoopy than some pretty fabric.
-Give yourself plenty of time! Make sure the paint is dry and the glue has settled before you present it to your sister.
-Do it with your strengths. I'm not a painter, so I'm not going to paint a mural of the Rocky Mountains on my big's paddle. I'm good with more crafty/scrapbooking things.
So there you have it! If you have any questions or want me to go more into depth about the paddles I've made, let me know! But overall, once you get started, you'll get the hang of it! Plus, it's so much fun!!
Monday, September 10, 2012
52 Reasons
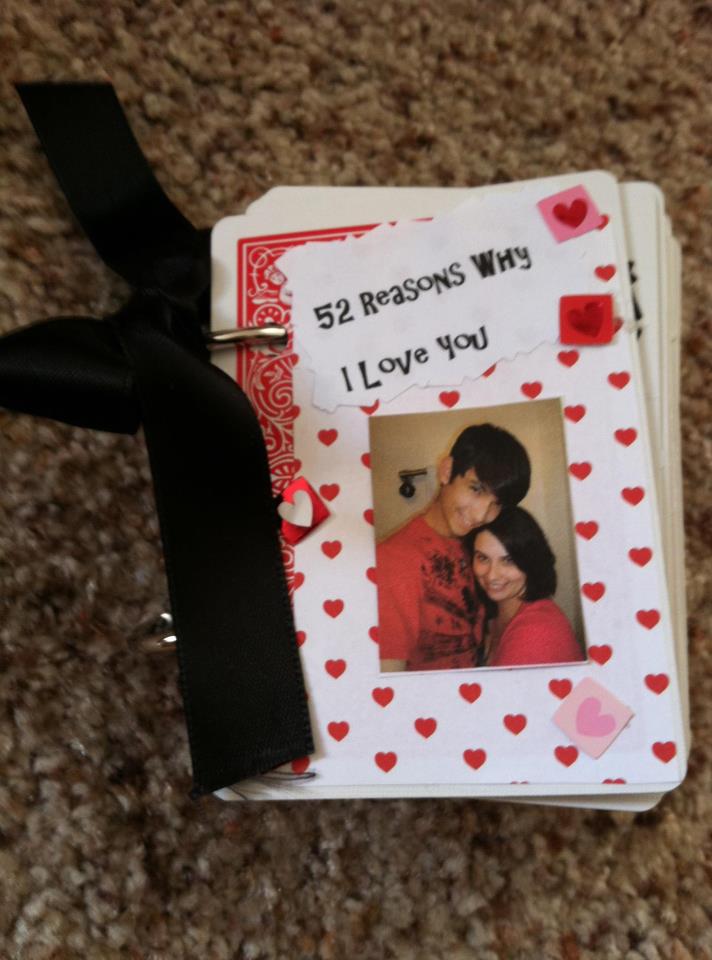
So if you are a crafty sort of person like me, you've no doubt have been on Pinterest to see this cute gift idea made out of a deck of cards. Basically, it's a little book that is generally called 52 Reasons Why I Love You, or 52 Things I Love About You.
Not only am I a sorority girl (which is you should know one thing about most sorority girls, is that they LIVE for crafting, especially gifts), but I also inherited a strong crafting gene from my mom. So it was no surprise that for my first year anniversary to my boyfriend (which is today! September 10!), that I would make him something. Not that I haven't already done that for his birthday, Valentine's Day, and Christmas. But this 52 Reasons idea definitely seemed perfect on so many levels.
First, we always go back and forth with reasons why we love each other, usually trying to outdo each other (maybe that's just me?). I also liked the idea because (correct me if my math is wrong, that is a very sore subject area for me) there are 52 weeks in a year, and we've been together a year.
And plus it just seemed adorable.
So I went to work. And being the sorority/college girl/procrastinator that I am, I saved all of it for the night before. No self-respecting college student does anything, not even cute, adorable crafts for their significant other, ahead of time.
With a grande size Starbucks Salted Caramel hot chocolate and a Disney movie off Netflix on hand, I went to town.
In case you're wondering...I used:
-1 Deck of Cards (Target for like $2.68 or something)
-A Hole Punch (note: while the Up and Up Target brand is only 99 cents, mine was sorta frustrating to use because it took a ton of pressure to use it. Plus it'd get stuck)
-Binder rings (Office Maxx, a bucket of like 12 for $6.99. Sadly the smallest quantity I could find) in 1 inch by the way
-Black Ribbon
-Red and Black Cardstock
-Red Hearts and Pink Chevron scrapbook paper
-Mod Podge
-Elmer's Permanent Tape/Glue stuff
-Cool scrapbook scissors
-Optional: Starbucks Beverage
And there are a ton of instructions out there on the web (trust me, I researched), so I think for the most part I'll spare you all the gory details. But here are some tips:
-Be as careful and precise as possible with the hole punch. I found out that binder clips are fantastic at keeping the cards perfectly straight.
-Mod Podge (which I started using after I ran out of my tape glue stuff) isn't the easiest, cleaniest, or best glue for this project. But it worked.
-Try numbering them! I totally forgot, and poor college student I am, refused to print out another five sheets to add them.
-Use cool scrapbooking scissors (the ones with the cool edges) if you can't cut a straight line to save your life like me.
-If you have awesome handwriting, handwrite it!
-Add cool little pictures and captions!
-DON'T toss the Jokers. You need them for the cover and back cover pages!!
-Have fun with it! Get as lovey dovey/goofy/sexy as you want! I did a mix of a lot of favorite memories, goofy moments, and things that I absolutely adore about him!
-While 52 may sound like a lot, it's not! Be selective!
Here are some of mine!
![]() |
| {Spending almost all day, everyday with you last school year} |
![]() |
| {How you are almost a food taller than me} |
![]() |
| {For leaving me breathless after every kiss} |
![]() |
| {Taking the chance to date me, even though you were afraid of being hurt} |
![]() |
| {For loving me} |
![]() |
| {Cuddling and sleeping in bed together} |
So I hope that overall you liked my book I made him. I loved this project, it was fun and easy and something that I hope to do again in the future as maybe a little gift?
And even though he doesn't read my blog, I want to say happy anniverssary! It's one of those things that just flew by and now here we are, at a year! Best year of my life and I can't wait for more!
Subscribe to:
Posts (Atom)